Monday, March 22, 2010

Welcome, Spring!

It's that time again! It might seem crazy to be thinking about garden season already but the season is short in New England and if you don't start preparing while it's still cold, you're behind before the race even starts. Priority #1 is starting seeds so you have something to put in the ground when the time comes. Nurseries want you to think it's hard to start your own seedlings but, in reality, the hardest thing about it is finding the space in your house... and when you really think about it, it's most likely easier than hauling flats of baby plants back to your garden.
The four basics of starting your own seeds are seeds, media, light, and heat. For seeds, I used Seed Savers again because they have an enormous selection of heirloom varieties and they act as a genetic repository and educational resource. In short, I think they're pretty darn cool. Sandhill Preservation is another great choice. The selection at Sandhill is slightly less enormous but I found some more obscure varieties in their catalogue last year when I couldn't find them elsewhere.
Once you've procured the seeds, you'll need a place to put them. Someplace hospitable. So what does a seed consider hospitable? If you go to a garden center you'll find that most of the seed-starting media contain peat moss. If you followed Smallholdings last year, you'll remember that peat moss is a non-renewable resource and that we should keep our paws off it. So why does everyone use it? Because it's very light and easy for seeds to push their way through- and because it's the only thing available in most garden centers. Other options are coir (coconut fiber) and various combinations are compost, soil and vermiculite (a mineral that prevents compaction and improves water retention). I use coir and have found it to work well. Farms tend to make their own blend, which you might want to look into if you have a huge garden but keep in mind that vermiculite is not the waste product of another process, but rather is mined and so is not a the sustainable choice. Coir in the form of individual pods, larger pressed bricks or loose fiber can be found easily online or at a hydroponics supply store. This year I'm trying out individual pods and re-using my plastic trays from last year, which I washed in very hot soapy water to remove fungus spores or harmful bacteria that might be left over from last year. With seeds and media in hand, just follow the instructions on the seed packets. Things that should be started ahead of time usually say "start indoors _ to_ weeks before the last frost". In eastern Mass, that magic date is May 15th, give or take. My approach is to start watching the 10-day forecast the last week of April and if it seems safe, I may take my chances and plant a few things. As for light, a few cheap fluorescent growlights will do the trick if you can get them very close to the seedlings- no more than 18 inches. Ideally, you can set up the whole operation in an area that gets some natural sunlight as well. I put mine on a timer so I don't have to worry about keeping with the cycle.

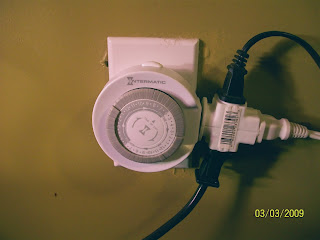
Heat can be accomplished in a few ways. Some seeds need to be quite warm to germinate (peppers, for example need about 80 degrees), so don't neglect this part. If money is no object, buy some warming cables or pads from a garden supply house. If your holdings are small, buy a clamp lamp at the hardware store, screw a 100 watt full-spectrum bulb into it and clamp it near enough to your trays to warm the soil to 80 degrees. Plastic covers help keep the temperature of the trays up but beware of mold. Open the lids several time a day and ventilate with a fan if possible. Speaking of fans, adding one to your setup can speed the hardening off process. A light breeze will cause plants to lignify or become woody and strong faster, which will be helpful when they're on their own in the elements. I've updated my system (a term I use loosely) a bit from last year. So here's the new and improved, Plant Nursery 3000
As you can see, it doesn't take a ton of money, special equipment, or expertise. To keep it all straight, don't forget to label the pods clearly with the name of the plant, the date you started it, and, in case you want to calculate germination rates, the total number of seeds you planted of each variety.Happy spring! Now, get to work.

Saturday, September 5, 2009

Tomatoes and Lessons in Humility; This Fungus is Bigger Than all of Us


It's been a while since the last post and much has happened in the interim. The main thing of note is that most of the tomato plants are dying a painful death of Late Blight, the very same vicious fungus that caused the potato famine in Ireland. Late blight has now been reported in every county in Massachusetts so if you have tomato plants, chances are, they are dying a painful death before your very eyes. Amidst the resulting heartburn and hand-wringing, there are a few things to be learned.
I noticed that the blight hit Smallholdings about three weeks later than it did Sienna Farms, which had plant dates within a week of my own. It could be luck or a result of differing weather conditions between Somerville and west of the city but it could also be the fruits of some preventative measures. I sprayed with baking soda water at a concentration of 1 Tablespoon of soda to one gallon of water on a bi-monthly basis and in the off-weeks I sprayed with bactillus subtillus. From what I understand, fungi prefer a slightly acidic environment so if you can raise the pH slightly you can prevent them from taking hold. Bactillus subtillus is a bacteria which, from what very little I understand, loves to chow down on fungus. In all likelihood it's very much more complex than this... but you get the picture.
After the blight took hold I continued with the bacteria spray and replaced the baking soda with strong chamomile tea. The plants are still dying and I am still sad about it but I'm picking a lot of perfect or near perfect fruit despite the yellow and wilted foliage. When the blight first hit, the fruits were completely unaffected but as the disease takes its course, some plants are producing fruits that rot before they ripen or split deeply from stem to blossom end. There is nothing worse than watching a large heirloom tomato swell to upwards of grapefruit proportions over several weeks only to be left with a mucilaginous pouch of rot hanging off the vine. The plants that produced profoundly damaged fruits had to be culled. Ripping out a plant still heavy with fruit is a hard thing to make yourself do but if the fruit is inedible, the plant is just fuel for the disease not to mention a hideous eyesore. Once the plant starts producing rot pouches instead of tomatoes, admit defeat, take it as a lesson in humility and rip the sucker out. Having reluctantly torn out the most diseased plants and continued the spraying regimen, the plants are still dying but they're doing it slowly enough that I'm stuffing my face with tomatoes in the meantime. If you are being overrun by the blight, try picking the tomatoes when they are almost ripe. The last stage of ripening seems to be the turning point.
It is important to remember not to compost diseased plant carcasses. It will only cause you more heartbreak next year; as you will spread the fungus all over your garden when you use the compost in the spring. It sounds crazy, but throw clippings from diseased plants in the trash.
Gardening is not like any other craft. You can't expect results in precise proportion to the amount of planning you did or the care with which you tended; there are millions of other factors at play. Some of the factors at play are so complex that you may not even know they're in the game, but they are and they may be winning. Sometimes the best we can do is mitigate. Sure, there are products intended for the killing of fungus but some of them will kill us too and others will decimate the microbial populations in our soil and make next year's plants more vulnerable, leading to a long term dependence on products that reverse the effects of the last products. Think spider-to-catch-the-fly. Think this-is -your-garden-on-drugs. Think maybe we should stick with organic, be brave and admit we've been bested by nature and give it another try next year... and don't forget to be thankful that you weren't counting on that crop of potatoes as your breakfast lunch and dinner for the next four months.

Tuesday, July 7, 2009

The Good Part; Part Two... The Eating Part

What's going on at Smallholdings? Salad.
Arugula, spinach, peas and herbs have been going strong for a few weeks now so I've been doing my best to keep up. The arugula is nice and spicy and goes great with hard boiled eggs and a salami I managed to smuggle back from Italy. The snap peas that I don't wind up eating before I even get back inside usually end up just sauteed with garlic or thrown on top of a hefty pile of arugula.


Strawberries and rhubarb are also on the scene but, much like this tart I put them in for the 4th, they're going fast.
I noticed that the first berries to ripen were much smaller than the later ones but sweeter and more intensely flavored. I'm not sure if the flavor difference has anything to do with the absurdly wet weather that started just after the first berries ripened, but I suspect the two are somehow connected.
Fennel is also ready- perhaps more than ready. During the long rainy spell a few plants got away from me and bolted before I could harvest them. As a fennel enthusiast, I really beat myself up over snoozing and losing so be warned, in wet weather, fennel can go from bulbous and perfect to leggy and bolted in the time it takes you to read this post. If you're growing fennel, I recommend you go check it now.
Fennel, radishes, broccoli, carrots and rhubarb all keep nicely in the fridge for short periods of time so pick them when they are ready rather than trying to leave them in the garden until the day you plan to eat them. If left too long, roots and stems can get woody and unpalatable. If you have to store some things in the fridge, just make sure the thermostat isn't on the coldest setting (you know, the one that keeps the beer really, really cold) or your veggies could freeze, which causes premature wilt and stale flavors.
As the season progresses, I'm trying not to forget to plant seeds for short-season salad supplies like greens and radishes so I have something to put the tomatoes on when they finally get here. Not that tomatoes are so far superior to the roots, tubers and leafies, they just take so long that the anticipation builds, sometimes to the point of distraction and neglect of crop succession. It's difficult to think about seeding when you're already harvesting but it definitely pays to put in on your calendar. I try to plant a row of seeds when I harvest a row of greens.
"Donde las papas, Sarita? Para la sopa!" My friend Pacho, a fellow cook (and farmer in his former life in Columbia), has been hounding me daily for fresh potatoes since I mentioned that I was growing them. He makes chicken and rice for our lunch every day and has serious plans for these potatoes. Pacho has a lot of good qualities but patience is not among them. "Soon, Pacho!" is not a good enough answer. The truth is, I'm not sure exactly when they'll be ready. Max, the farmer of Sienna Farm tells me that when the plants start to to look "really s%$@*y" I should pull one up and see what's underneath. I harvested too early last year and wound up with micro potatoes, which was fine... I just really like potatoes so bigger is better. Until then, all I can say is "Tranquilo, ok! Soon!"


Wednesday, June 10, 2009

The Good Part; Part One

With consistent overnight lows over 50 degrees, things are really starting to look up! At this point, all of the seeds are in the ground and the last transplants went in this past week. The last to go in was the peppers, because they grow slowly and need nice warm weather. In addition to some promising young plants, Small Holdings Farm welcomes the premier Dos Manos furniture project, two handmade dovetailed benches. They are a great place to sit and admire the plants, as well as recover from the backbreaking work of belt sanding them.

The same old low-tech water retention bucket is still hanging around in the foreground for lack of funds for something tidier and more high tech.
Beyond the water bucket is a bed of perennial herbs with fennel and peas mixed in this time around. I screwed some eye hooks into the house and strung fishing line through them to create a trellis for the peas in order to capitalize on vertical space where there is a shortage of square footage on the horizontal. The huge green bush in the middle of the top is All Blue and Corolla potatoes. They are in flower right now so I'm just waiting for the plants to start looking really tired, which is their signal that it's time to start digging. It shouldn't be long now.

Along the fence are tomatoes and radishes. I ate the first radish last week and it was crisp and spicy just as I expected. A few have fallen prey to bugs and I'm in the process of identifying the culprits. In anticipation of pulling a row of radishes, I planted a new one behind it and the replacements are just starting to pop up now.
The tomatoes are growing fast and it's just about time for stakes. The Hillbilly potato leaf in the corner is tall and leggy, while the Green Sausages in the middle are much more bushy and squat. The variety visible across the species in the foliage alone is amazing, not to mention the fruit!

Along the back wall are more peas, which are climbing the fence quite well. Amongst the peas are cucumbers, melons, that have yet to make an appearance above ground, and Golden Zucchini. On the right we have Brussels Sprouts and Romanesco Broccoli. In the middle are dwarf varieties of tomatoes, bell and hot peppers, husk cherries, one Buttercup squash plant, and a bit of spinach. I had tomatoes and squashes in this bed last year and planned to rotate them out this season but there was simply no other place to put them. I pitched the idea of veggies in the front yard to our downstairs neighbors and was rebuffed, so I am applying a bacterial supplement to prevent mold and crossing all fingers and toes that my plants don't get sick. The only residents of this bed that are ready for eating are the pea greens and tiny baby peas. In case you didn't already know, you can eat the leaves, vines and flowers of the pea plants. Just pick off the curly, wiry parts that they use to grab onto things as they climb (because they grab onto your throat as you swallow!).

Along the fence we have a cabinet rescued from one of the ubiquitous June 1st-in-Somerville piles, which is a real champ at holding fire wood, watering cans and seedling trays. Beyond is the strawberry patch, which is ripening as we speak, and the lone, gigantic rhubarb plant. I boiled some rhubarb with spearmint and a little sugar for a tasty juice/tea last weekend and it was a hit.


Look, strawberries! They're starting off slow with just a couple ripe each day but I'm sensing a deluge in the near future and readying my pie dough for the occasion.


The arugula is really going crazy in the shady patch by the back door. I was a little concerned about this patch initially but luckily, as is often the case, my worry was unwarranted. I'm about to cut most of the greens down to make room for the row of seeds I sowed last week and to let a little more sun get to the surrounding head lettuces, spinach and chards... and because I have a hankering for a salad right about now.
Leaving arugula in the ground until you have the salad bowl out is the best way to keep them fresh. I works better than any tupperware contraption you can buy. If you must pick before you are ready to eat, take a cue from my mom and wash your greens then wrap them very loosely in a linen towel then put the towel in a plastic shopping bag and put the bag in the crisper drawer... if your fridge is anything like mine (jam-packed with 4 roommates' worth of food), you'll just leave them in the ground until the minute you're ready to eat.

Thursday, May 21, 2009

Up and Out

It's been a little while since I've had time to post but I haven't been idle, nor have I been neglecting Small Holdings Farm. By some amazing stroke of luck I was able to spend a week amongst grapevines and olive trees in Tuscany eating myself silly and visiting my chum Billie Valentine.  Now I'm more relaxed and fully prepared for a raucous garden season... and I desperately need the exercise.

Hopefully everyone has had time to get a soil test and with some luck, you are heavy metal-free and ready to begin the fun and exciting process of  "hardening off" your seedlings.  Hardening off is the process by which you get your baby plants ready to survive in the real world... like plant college only way shorter and free.
I have had my seedlings sitting on the radiator under grow-lamps and while the plants have been content and growing well, they are by no means ready for direct sunlight, summer heat, wind and cold nights.  Putting a fan next to the seed trays helps to expedite the hardening off process but in keeping with the college metaphor, it's like a correspondence degree from ITT Tech; i.e. no substitute for the real deal.
A couple of days before you begin hardening off, back off your water and fertilizer regimen a little.  Don't starve your plants, just give them the signal that mommy isn't always going to be there with the watering can.  Ideally, the first time they go outside will be an overcast day with not too much wind.  If it's bright and sunny but you're dying to get started, you can rig up a shade tent with a piece of semi-sheer cloth and a couple of well-placed lawn chairs or put the plants under your yard furniture.
Start with six or eight hours then bring them in for the night.  You are likely to notice that the stems already seem a little stiffer.  If the weather is fair the following day, set them out again and bring them in just after dark or if the weather turns ugly.  On the third day, give them a few hours of more direct light, making sure to put them back in the shade if they start to look slightly wilted and if the predicted overnight low is over fifty, leave them out all night.  On the morning of the fourth day, the plants should seem significantly more grown up.  They might not be much taller but the stems should be quite sturdy and in the case of tomatoes, slightly lignified, or woody. 
In New England, we can never count on the weather to hold for four days in a row during the spring so one of the things you can do to make your schedule slightly less dependent on wind, sun and the actual last frost date is to set up a small hoop house.  It won't be up for very long so stick to themes of efficiency and frugality when considering your materials. I used U-shaped bamboo poles, a heavy duty plastic drop cloth, some string and safety scissors to  build my hoop house. A grand total of $0.  The bamboo poles were left over from trellising beans last year and the drop cloth was left over from a painting project a few years back.
 
If you don't have any bamboo poles around the house and you can't get them at the garden store for a few dollars, think about heavy gauge wire, flexible plastic tubing and thin green tree limbs as viable options for construction of the ribs.  The ends should be open with enough plastic hanging over so you can fold the tube closed at night or during particularly windy spells then open them up again during the day.  Keep in mind that the hoop house will trap heat during the day so if you forget to open it up in the morning, you can very easily cook all of your seedlings and set your garden back a few months.  In Somerville, a setback like that can cause a serious problem with late season crops so I set my alarm clock and leave myself notes.
While your plants are preparing for life outdoors, make sure that your soil is ready to receive them.  Pull any weeds that will block light or potentially strangle your plants, apply some compost and assess the pest threat level.  If you notice slugs, put out shallow pans of beer or water with some active dry yeast and sugar.  Slugs also like to be under cover so putting a board over an affected area will create a little shelter for them and you'll know where to find them when you're ready to either massacre or relocate them.  If you notice mice or rats, set traps or deterrents.  Rats and slugs are the two pests that I hunt with intent to kill.  Slugs will eat holes in the leaves of squashes and rats will make themselves at home and when there's fruit to be eaten, you won't be the one eating it.  Rats can also spread diseases.. and I won't even get into the gross-out factor.  There are humane traps available for vegetarians, buddhists and bleeding hearts but if you choose to trap and relocate, burn plenty of gas between your garden and the release site.
Once the plants are sturdy and accustomed to life outdoors and the soil is warm and hospitable, it's time to transplant.  Begin by watering the plants just enough that you'll be able to pull out the whole root ball with it's soil plug.  This makes for less mess and less tearing of roots and stems as dry chunks of soil fall off the root ball.  Second, dig a hole big enough to accommodate the entire root ball plus a trowel-scoop of compost.  Throw the compost in the hole, insert the plant, fill in with dirt, press down gently and voila! It's summer.
Treat all of the new transplants to a nice, fully quenching drink of water then treat yourself to an ice cold beverage while you admire your handy work and peruse some cookbooks so you'll be armed with ideas when the ingredients arrive.

Monday, April 6, 2009

The Dirt

Now that we've got many of our seeds started it's time to start thinking ahead to transplant time.  Adios, down jacket! Hello fingernail dirt!
Before you consider the wholesomeness of your soil for your plants, get a heavy metal test to make sure that you don't have lead, mercury or the like in your yard. Heavy metals are neuro toxins, i.e. they poison your BRAIN! So if you are fastidious about nothing else, be fastidious about this. I got mine through UMASS. Get info at
http://www.umass.edu/plsoils/soiltest/
Here in Somerville we have many houses with lead paint and many residential lots that were industrial sites in the past so heavy metal contamination is prevalent.

Once you have made certain that your site is free of heavy metals it's time to check your pH and macro-nutrients.  If you remember anything from high school chemistry... or in case you don't remember a thing, pH is the scale by which acidity and alkalinity are measured and for most plants, you want a pH in the neighborhood of 7 (1 is most acidic, 14 is most alkaline).  Slightly below 7 will keep most vegetables happy.  The macro-nutrients are nitrogen, phosphorus and potassium.  
Some testers are meters with metal prongs and others are tubes in which you place about 1/2 teaspoon of soil with the contents of a capsule and distilled water. I chose the tube variety because the kit included tests for pH and all of the macro-nutrients.  They cost about $4.  I picked up four so I could test before planting anything then make changes and test again, then test once more in the middle of the season.
Nitrogen is the most important early in the season because it contributes to leaf growth and general hardiness but later in the season, too much nitrogen can lead to very leafy plants with few flowers and thus few fruits.  Potassium promotes root growth so if your target product is a root (eg. carrots), favor potassium over nitrogen.  Potassium also works in tandem with phosphorus to help reproductive organs like flowers and fruits grow.  I'm not a chemist or a botanist, but from what reading I've done, I've gathered that ample nitrogen is very important when you first plant and potassium and phosphorus gain import as the season progresses and harvest time draws nearer.  If you've got several soil tests on hand you can make sure you have proper levels of each element throughout the season.  To make it more complex, if the soil pH is not correct, some minerals will not be accessible to the roots even if they are present at appropriate levels.
If your soil is anything like mine, it's been neglected for years and isn't exactly prepared to nurture your delicate little seedlings but don't fret, it's not time to transplant yet and you have some time to make corrections- and if you've tested, you can make targeted corrections.
Here's a quick guide I've compiled using two books (Botany for Gardeners, and The Gardener's A-Z guide to Growing Organic Food)
Problem                                            Solutions
Too acidic                                    Add limestone
Too alkaline                                 Add sawdust or sulphur
Not enough nitrogen                     Add compost, manure,                                                   or fish emulsion
Not enough phosphorus                Add compost, bone meal                                                 or introduce worms
Not enough potassium                  Add compost, kelp,                                                         worms, rock potash,
                                                or crushed granite

Tuesday, March 24, 2009

What's up?

Romanesco Broccoli seedlings are among the first-born members of this year's Small-Holdings lineup.  They are still swaddled in a makeshift plant-nursery consisting of seed trays piled on top of the radiator with a 25 watt fluorescent plant bulb and a 60 watt incandescent plant bulb in a clamp lamp. Between the radiator and the 60 watt incandescent bulb, there's enough heat to germinate things like tomatoes and peppers which, much like me, won't come out unless it's almost 70 degrees.  So in case you're thinking you don't have the time or space to start your own seeds, think again- then go to the hardware store.
What you need:
1 radiator- luckily, that came with your apartment. Check!
1 clamp lamp $13 
1 fluorescent strip fixture $8.99 
1 fluorescent tube $6
1 incandescent plant bulb $6.99
Subtotal: 34.98
Plus Seed trays $6 each for 72 cells (that's 8.3 cents per seed)
So if you start 144 seeds, you've spent 24 cents per plant in lighting and heating equipment and 8.3 cents per seed in real estate. So for 32.3 cents extra per seed (which range from 4 to 16 cents each), you don't have to figure out how to get dozens of six week old transplants from the garden center to your house without killing them or wrecking the upholstery in your zip/borrowed/not paid off car. Worst case scenario, you spend about 50 cents per plant plus electricity whereas at the garden center they'd relieve you of about 6 times that much hard-earned cheddar and you'd have to vacuum the car afterwards.  As far as the Dos Manos financial division is concerned, that sounds less like a convenience and more like insult to injury. You could figure in labor costs but seeding is easy and fun and you can do it any time you want while singing along to David Bowie's greatest hits and drinking beer- to me that isn't labor, that's very nearly recreation.
For my seed trays I used a complete setup made by Burpee that comes with the large tray that holds the cells, 9-cell trays, dehydrated coir pellets and a clear top to hold in heat and moisture.  I've been shopping around and this was the only one I could find that doesn't use peat as the starting medium.  Instead it uses coir, a coconut fiber product.  Peat is a non-renewable resource so even though those peat pellets and little peat pots for seeding are natural and biodegradable, you should try not to use them because you can't offset or reverse the environment effects of consuming that resource... and that isn't what organic gardening is all about, is it?  Ask the buyer at your local garden center to stock coconut derived or other sustainable seed starting mediums. The plastic trays are a bit of a bummer but they are both recyclable and reusable.  If you are re-using some old trays from last season, like Dos Manos, just wash them thoroughly in very hot water and your favorite earth-friendly disinfectant to prevent spreading fungus and disease from last year's soil or seedlings.